
Th2 . 18, 2025 07:36
Back to list
cable gear
Experiencing a snapped handbrake cable can be alarming and troublesome, particularly when it comes to vehicle safety and control. Understanding the intricacies of a handbrake cable, its significance, and dealing with a snapped cable efficiently not only boosts confidence in handling such situations but also underscores your automotive expertise.
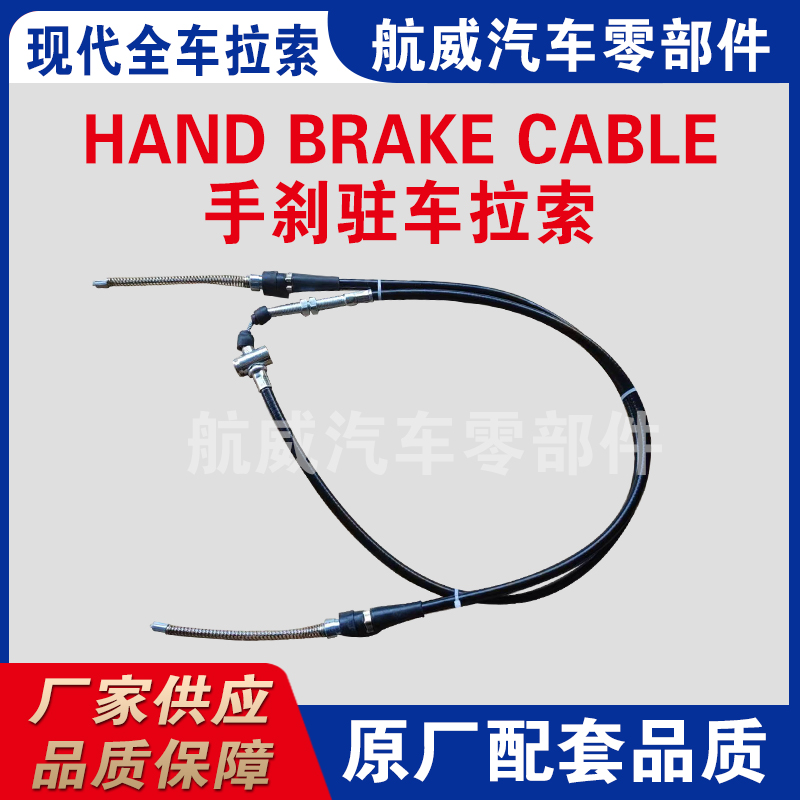
Replacing a snapped handbrake cable requires tools such as a jack and jack stands, socket set, and new cables that are vehicle-specific for the fitment. Begin by ensuring the car is secure and elevated safely before any repair. Removing the rear wheels provides better access to the drum or disc brakes where the cables attach. Documentation such as the vehicle’s manual or repair guides can provide detailed specifications and the sequence of parts removal, ensuring a methodical approach to replacement. Remove the tension by detaching the cable from the handbrake lever inside the vehicle. Next, under the vehicle, locate the junction where the cable splits to each rear wheel. Detach these connections, paying close attention to the routing which will guide the installation of the new cable. After removing the damaged cable, installing the new cable follows the reverse order of removal. Ensure proper tension is applied to the cable upon reassembling, testing the handbrake function before calling the task complete. Preventive maintenance of handbrake cables can prolong their life and efficiency. Regular inspection for wear and application of rust-resistant lubricants can fend off potential failures. Furthermore, keeping an eye on the smoothness and resistance of the handbrake lever during regular vehicle use can pre-empt sudden issues. Authority in automotive knowledge and meticulous adherence to maintenance rituals maintain the trustworthiness essential for vehicle reliability. Incorporating these processes within routine car care ensures both the safety and longevity of the vehicle’s braking system, enhancing overall driving peace of mind. For vehicle owners keen on DIY maintenance or learning the intricacies of automotive care, mastering handbrake cable replacement showcases mechanical proficiency and reinforces confidence in vehicle safety management.
Replacing a snapped handbrake cable requires tools such as a jack and jack stands, socket set, and new cables that are vehicle-specific for the fitment. Begin by ensuring the car is secure and elevated safely before any repair. Removing the rear wheels provides better access to the drum or disc brakes where the cables attach. Documentation such as the vehicle’s manual or repair guides can provide detailed specifications and the sequence of parts removal, ensuring a methodical approach to replacement. Remove the tension by detaching the cable from the handbrake lever inside the vehicle. Next, under the vehicle, locate the junction where the cable splits to each rear wheel. Detach these connections, paying close attention to the routing which will guide the installation of the new cable. After removing the damaged cable, installing the new cable follows the reverse order of removal. Ensure proper tension is applied to the cable upon reassembling, testing the handbrake function before calling the task complete. Preventive maintenance of handbrake cables can prolong their life and efficiency. Regular inspection for wear and application of rust-resistant lubricants can fend off potential failures. Furthermore, keeping an eye on the smoothness and resistance of the handbrake lever during regular vehicle use can pre-empt sudden issues. Authority in automotive knowledge and meticulous adherence to maintenance rituals maintain the trustworthiness essential for vehicle reliability. Incorporating these processes within routine car care ensures both the safety and longevity of the vehicle’s braking system, enhancing overall driving peace of mind. For vehicle owners keen on DIY maintenance or learning the intricacies of automotive care, mastering handbrake cable replacement showcases mechanical proficiency and reinforces confidence in vehicle safety management.
Next:
Latest news
-
Upgrade Your Clutch System with Premium Hydraulic Clutch LinesNewsJul.31,2025
-
Unlock the Power of Precision with Our Throttle CablesNewsJul.31,2025
-
Unleash Power and Precision with Our Accelerator CablesNewsJul.31,2025
-
Experience Unmatched Safety with Premium Handbrake CablesNewsJul.31,2025
-
Enhance Your Vehicle's Performance with Quality Gear CablesNewsJul.31,2025
-
Workings of Clutch Pipe and Hose SystemsNewsJun.04,2025